Showing posts with label User Interface. Show all posts

Wednesday, August 7, 2013

Tag Clouds vs. Pie vs. Bar Charts

When I was freshman in college I learned a lesson about making sure to emphasize important points. I got a C- on the very first paper I wrote as a college student. When I looked at the comments made by the Teaching Assistant (TA) who graded my paper, they were all very positive. In fact there were no comments at all to explain why I got the grade I got. When I asked the TA to tell me why he gave me a C-, he said that I made two mistakes. I did not meet the minimum pages requirement (my paper was 18 pages instead of 20); and I did not provide a summary. He gave me some advice about how to handle both issues in the future:
  • First, make sure to introduce the topic (i.e., talk about what you are going to talk about)
  • Next, discuss the topic (i.e., talk about it).
  • Last, summarize it (i.e., talk about what you just talked about).
So in that spirit let me summarize now my recent posts on Tag Clouds. One of my points was that Tag Clouds were a good way to display BI data in a meaningful way. Consider for example a Tag Cloud as originally described in this post:
vs. a Pie Chart
vs. a Bar Chart

on the same data (sashelp.shoes).

Don't know about you, but seems to me that the Tag Cloud does a much better job of displaying the data in a meaningful way.

In my next three posts I described:
And to re-emphasize the re-usability point, consider this example where I just specify a different form and get a different set of data presented in the Tag Cloud.

http://demos.hcsbi.com:8080/SASStoredProcess/guest?_program=/sspebook/sasServerPage&page=ajaxContainer&formUI=classform.html

In the not to distant future I will be blogging on another use of this AJAX template: a expanding/collapsing tree view of a summary data set:
Before that however I will digress a bit to talk about using PROC STREAM and SAS Server Pages in Base SAS to produce reports.

Monday, August 5, 2013

Tag Cloud SAS Server Page Components - Part 2 (of 2)

I recently posted about an AJAX and JQuery based Tag Cloud demo. I next described the re-usable AJAX template that is the foundation for the demo. In my last post I described two of the four component SAS Server Pages. This post completes the series with a description of:
  • tagCloud.html: the SAS Server Page that generates and displays the tag cloud (seen in left hand side of figure 1).
  • tagCloudJSON.sas: the SAS Macro the creates the JSON (JavaScript Object Notation) used to populate the tag cloud.
  • cloudDrill.sas: the SAS Macro that displays the drill-down results (seen in the right hand side of figure 1) when the user clicks on a word in the tag cloud.
Figure 1. Tag Cloud, including drill-down results.

The tagCloud SAS Server Page

The JQCloud JQuery widget is used to generate the tag cloud so we first have to define the style sheet and the JavaScript code to the page. Note the PROC STREAM readfile directive is used to do that. It simply includes the contents of the two files as is. Note that we could have also downloaded and put these files in our web server directory tree.

<html>
 <head>
  <style>&streamDelim readfile srvrpgs(jqcloud.css);</style>
  <script>&streamDelim readfile srvrpgs(jqcloud-1.0.3.js);</script>
 </head>


Next, we make sure that the parameters that define the tag cloud exist as macro variables and have default values.

 <body>
  %global data statistic word weight;
  %let data = %sysfunc(coalescec(&data,sashelp.shoes));
  %let statistic = %sysfunc(coalescec(&statistic,sum));
  %let word = %sysfunc(coalescec(&word,Subsidiary));
  %let weight = %sysfunc(coalescec(&weight,Sales));


In order to make the page completely stand-alone, the code to summarize the data and calculate the weight to apply to each word is executed using the dosubl function, invoked via the %sysfunc macro.

  %let rc = %sysfunc(dosubl(
               proc summary data = &data nway;
                class &word;
                var &weight;
                output out=cloud &statistic=;
               run;
            ));

Next a div tag is used to define the display area for the the tag cloud. And id value of cloudCanvas is used so the tagCloud plug-in can reference this area of the display. Note that the width, height, and border parameters could be parameterized using macro variables.

The newline directive is used (here and in the JavaScript below) to ensure that PROC STREAM does not insert a line break that could potentially cause problems. The use of the newline directive in this way should be considered a required Best Practice.

  &streamDelim newline;<div id="cloudCanvas" style="float:left;
                            width: 600px; height: 400px;
                            border: 1px solid #ccc; margin-bottom:5px">
                       </div>

The data for the tag cloud is specified in a JavaScript variable (called tagCloud) whose value is a JSON string (the macro that generates the JSON string is discussed below).

  &streamDelim newline;<script>
  &streamDelim newline; var tagCloud =

                             %tagCloudJSON
                                 (data=cloud
                                 ,word=&word
                                 ,weight=&weight
                                 )

Next is the JQuery syntax that says the the jQCloud JavaScript code should use the tagCloud variable as the source of the JSON used generate the display for the cloudCanvas div.

  &streamDelim newline; $(function() {
  &streamDelim newline;   $("#cloudCanvas").jQCloud(tagCloud);
  &streamDelim newline; });


Next is the JQuery syntax that detects when a word has been clicked on. Here, we call the cloudDrill macro and display the results using AJAX in the drillResults region of the screen.

  &streamDelim newline; $("#cloudCanvas").click(function(e) {
  &streamDelim newline;   var selected = $(e.target).text();
  &streamDelim newline;   $("#drillResults").load("&_url?_debug=&_debug%nrstr(&)_program=&_metafolder.runMacro%nrstr(&)macroToRun=cloudDrill%nrstr(&)data=&data%nrstr(&)class=&word%nrstr(&)word="+encodeURIComponent(selected));
  &streamDelim newline; });
  &streamDelim newline;</script>


And finally, is the definition of the area, with some default initial text, where the resulting drill down table is displayed.

  <div style="float:left;  margin-left:10px;" id="drillResults">
   <br>Click on a word/phase in the tag cloud to see the detail.
   The drill-down report will be displayed to the right of the

   Tag Cloud if there is enough horizontal space. Otherwise it
   will be displayed below the Tag Cloud.
  </div>
 </body>
</html>


That's all there is to it. While the JQuery syntax takes some getting used to; it really is fairly straightforward.

The tagCloudJSON Macro

A macro is used to read the data set and generate the needed JSON.

%macro tagCloudJSON
      (data = _last_
      ,where = 1
      ,word = word
      ,weight = weight
      );


The SCL data access functions are used via the %sysfunc macro function.

 %local dsid wordNum weightNum weightFmt comma;
 %let dsid = %sysfunc(open(&data(where = (&where))));
 %let wordNum = %sysfunc(varnum(&dsid,&word));
 %let weightNum = %sysfunc(varnum(&dsid,&weight));
 %let weightFmt = %sysfunc(varfmt(&dsid,&weightnum));


We loop through the data set reading each observation generating the needed JSON.
  • the text attribute is the value of the word (the class variable in SAS terminology).
  • the weight attribute is the unformatted value of the analysis variable.
  • And the html attribute is a nested JSON string the specifies that the hover text should be the formatted value of the analysis variable. And since the word is clickable, we make sure that the pointer attribute is used when the user hovers over a word.
The comma macro variable is set to blank initially and then reset so that each observations JSON is comma separated.

 %let comma=;
 &streamDelim newline;[

 %do %while(%sysfunc(fetch(&dsid))=0);
    &comma &streamDelim newline;
    {
      text:   "%qtrim(%qsysfunc(getvarc(&dsid,&wordnum)))"
    , weight: %qsysfunc(getvarn(&dsid,&weightNum))
    , html:   { title: "%qsysfunc(getvarn(&dsid,&weightNum),&weightFmt)"

              , style: "cursor:pointer"
              }
    }
    %let comma = ,;
 %end;


And finally, we close the data set and close the JSON string.

 %let dsid = %sysfunc(close(&dsid));
 &streamDelim newline; ];

%mend tagCloudJSON;

The cloudDrill Macro 

This macro is executed by the runMacro stored process whenever the user clicks on a word. Three parameters are passed to it:
  • The name of the data set (referenced here as &data) that provided the source data for the tag cloud.
  • The name of the class variable that is the value for the words (referenced here as &class).
  • The actual value the user clicked on (referenced here as &word).
Note also that the class variable is displayed in the PROC REPORT spanned header and so it is defined using the noprint define statement attribute so screen real estate is not used/wasted to display it on each row.

 %macro cloudDrill;
 options nocenter;
 proc report data = &data nowd split='_' missing;
  columns ("&Word" _all_);
  where &class = "&word";
  define &class / noprint;
  rbreak after / summarize;
 run;

%mend cloudDrill;

Summary

I hope that this all makes sense. If not, feel free to post a question.

I plan to use the AJAX template discussed here and in my last three posts in future blog posts that illustrate additional examples of what can be done. So please make sure to check them out.

Wednesday, July 31, 2013

Tag Cloud SAS Server Page Components - Part 1

I recently posted about an AJAX and JQuery based Tag Cloud demo. And in my last post I described the re-usable AJAX template that is the foundation for the demo. In this post I am I'll describe two of the component SAS Server Pages:
  • shoesUI.html: the form that is used to capture the users choices. The form to use is passed as a parameter to the AJAX template.
  • hcsFooter.html: the text to include at the bottom of the page.
These two SAS Server Pages generate the parts of the display seen in regions 3, 4 and 5 of Figure 1.

Figure 1
The other components for this demo:
  • the Tag Cloud SAS Server Page that leverages the JQuery Tag Cloud plugin.
  • the macro that creates the JSON used by the JQuery Tag Cloud plugin.
  • the macro that produces the drill down report
will be discussed in my next post.

So lets get started with the details for these two (simple) components.

The shoesUI.html SAS Server Page

It is a best practice to always propagate the value of _debug. The following two lines make sure the macro variable always exists and assigns a default value of no debugging (0).

%global _debug;
%let _debug = %sysfunc(coalesceC(&_debug,0));


This JavaScript statement customizes the title seen in the browser for the page so it is specific to this demo. Note that a macro variable can't be used here (see the discussion of messageText below) since the document title is defined in the head section of the page.

<script>document.title="Tag Clouds as a Graphical Display";</script>

Define the hidden name/value pairs used by the demo. Note that we can propagate the value of _program since we are using the same stored process.
  • As mentioned above, the tagCloud SAS Server Page will be discussed in my next blog post.
  • For purposes of this demo, the data set to use and the statistic to calculate are not parameters. But they could easily be made into parameters that the user can specify.
<input type="hidden" name="_program" value="&_program">
<input type="hidden" name="_debug" value="&_debug">
<input type="hidden" name="page" value="tagCloud">
<input type="hidden" name="data" value="sashelp.shoes">
<input type="hidden" name="statistic" value="sum">

Next is the select tag that allows the user to select which class variable is used by the Tag Cloud to define the tags/words that are displayed. See region 3 above.

NOTE: if the data set were passed in as a parameter, we could make this list dynamic using dictionary.columns (or sashelp.vcolumn), restricted to character columns. Or perhaps a custom parameter file. The key is that this could be easily customized and made data-driven.  Also seen in region 3 above.

<p>
<b>Select&nbsp;Class&nbsp;Variable</b>
<br>
<select name="word">
<option value="Product">Product</option>
<option value="Region">Region</option>
<option value="Subsidiary" selected>Subsidiary</option>
</select>


Just as for the name of the class variable, we include a select tag to allow the user to select the analysis variable used to specify the weight to assign to each tag/word. This could also be easily customized and made data-driven.

<p>
<b>Select&nbsp;Analysis&nbsp;Variable</b>
<br>
<select name="weight">
<option value="Inventory">Inventory</option>
<option value="Returns">Returns</option>
<option value="Sales" selected>Sales</option>
</select>


And now the submit button. The AJAX template includes the form and /form tags and also includes the JQuery AJAX code that handles turning this simple form into an AJAX call. Again, the button can be seen in region 3 above.

<input type="submit" value="Generate Cloud">

And the final piece is this %let statement that defines the text to be displayed in the region of the page where the output will be displayed (see region 4 above). This allows for the custom instructions for any given demo - all defined using the SAS Server Page that contains the form elements.

%let messageText=
    <b>The tag cloud will be displayed once the <i>Generate Cloud</i>

       button is clicked.</b>
    <p>The form is also hidden when you click the <i>Generate Cloud</i>

       button.
    <p>To re-display the form in order to make another selection, just

       click the arrow in the upper left corner.
;

The hcsFooter SAS Server Page

The footer is pretty simple HTML. The most complicated part is the use of div tags to line up and format the text.

First an outer div tag to contain the footer.

 <div style="clear:both; height:15;
             background-color:#E4E4E4; color:#999999;
             font-family:Geneva, Arial, Helvetica, sans-serif;
             font-size:10px; font-style:italic;">

An inner div tag to that left justifies part of the footer.

 <div style="float:left;">
   <a href="http://www.sascommunity.org/wiki/SAS_Server_Pages_and_More:_A_Framework_for_Generating_Dynamic_Content"
      style="text-decoration:none" target="_blank">
   SAS Server Pages and More: A Framework for Generating Dynamic Content
   </a>
 </div>


Another div tag to right justify part of the footer.

 <div style="float:right;">
   <a href="http://www.hcsbi.com"
      style="text-decoration:none" target="_blank">
   Henderson Consulting Services
   </a>
 </div>


And finally, close the outer div tag for the footer.

</div>

Summary

As I hope this post makes clear, parameterizing the AJAX template so it can be used for any number of custom Stored Process (or SAS/IntrNet Application Dispatcher) reports, is reasonably straightforward. And, yes, there will be more examples of using this AJAX template for different reports in future blog posts.

Monday, July 29, 2013

A SAS Server Page AJAX Template

In my last post I described a a SAS Server Page demo that used JQuery to provide both AJAX tools and a widget to produce tag clouds.

This is the first of several posts that will drill into the details of how it works. The topic for this post is a re-usable template that can be used for any number of reports: the ajaxContainer SAS Server Page (see figure 1).

Annotated ajaxContainer SAS Server Page
The contents of the SAS Server Page are described below with references to the numbers for each part of the output.

The first thing we do is ensure that the macro variables referenced/used in the template exist:
  • the formUI macro variable will resolve to the name of the SAS Server Page that contains the form fields so the user can make some selections (see 3 in figure 1). Note the use of %sysfunc with the coalesceC function to assign a default.
  • the footer macro variable will resolve to the name of the SAS Server Page that contains the HMTL to display at the bottom of the page (see 5 in figure 1). 
  • the messageText macro variable is assigned a value in the SAS Server Page referenced by formUI. This allows the text to be easily customized.
%global formUI footer messageText;
%let formUI = %sysfunc(coalesceC(&formUI,shoesForm.html));
%let footer = %sysfunc(coalesceC(&footer,hcsFooter.html));


Generate the HTML and in the head section, provide links to the hosted (by Google) JQuery tools. Using such links means that you need not download/install the basic JQuery environment script files to your server. But you do need to check for updates (e.g., the 1.10.1 and 1.10.3 in the URLs). Also note that by starting the URL with // instead of http or https allows will allow http vs. https to be used based on the base url.

<html>
<head>
<title>Sample AJAX Container</title>
<script

   src="//ajax.googleapis.com/ajax/libs/jquery/1.10.1/jquery.min.js">
</script>
<script

   src="//ajax.googleapis.com/ajax/libs/jqueryui/1.10.3/jquery-ui.min.js">
</script>

Next is the JavaScript that controls the toggling of the UI/form. The ids showUI and hideUI reference a right arrow (show) and the left arrow (hide), discussed below that toggle the display of the form on/off. This technique allows the output to be seen on the same page as the form, while allowing to form to be hidden so as to maximize the screen real estate available to the output. 

Note that JavaScript could be included from another SAS Server Page using a macro variable similar to formUI and footer.

<script>
function toggleUI() {
 if (document.getElementById('showUI').style.display == 'none')
 { document.getElementById('showUI').style.display = 'block';
   document.getElementById('hideUI').style.display = 'none';
   document.getElementById('UI').style.display = 'none';
 }
 else
 { document.getElementById('UI').style.display = 'block';
   document.getElementById('hideUI').style.display = 'block';
   document.getElementById('showUI').style.display = 'none';
 }
}
</script>

</head>

Just some HTML to define the text that appears at the top of the page. See 1 in figure 1. This could also have been parameterized like the footer, but I choose to show both techniques in this sample.

<body>
<div style="margin-bottom:5px; clear:both; height:15;

            background-color:#E4E4E4; color:#999999;
            font-family:Geneva, Arial, Helvetica, sans-serif;
            font-size:10px; font-style:italic;">
 <div style="float:left;">

  Learn more about these techniques in the SAS Press Book
   <a href="http://support.sas.com/publishing/authors/extras/64993b.html"
      style="text-decoration:none" target="_blank">
    SAS Server Pages and More: A Framework for Generating Dynamic Content
   </a>
 </div>
 <div style="float:right;">

  More
   <a href="http://hcsbi.blogspot.com/search/label/SAS%20Server%20Pages"
      style="text-decoration:none" target="_blank">
    SAS Server Page
   </a>
    examples can be found on my
    <a href="http://hcsbi.blogspot.com/"
       style="text-decoration:none" target="_blank">
     blog
    </a>
 </div>
</div>


The arrows that can be used to toggle the display of the form are defined next. See 2 in figure 1. The images are encoded as mentioned in my blog posting on base 64 encoded images.  This allows for the page to not have to worry about a path to the images directory and makes it more easily re-used and moved.

Note also the use of &streamDelim newline; to force PROC STREAM to issue a line feed. This helps ensure that linefeeds are not issued in the middle of some HTML text that perhaps should not be broken across lines.

&streamDelim newline;
<a id="showUI" href="JavaScript:toggleUI();"
   title="Show Selections"
   style="text-decoration:none; display:none;">
&streamDelim newline;

<img src="data:image/png;base64,R0lGODlhDAALAJEAACpVgbHB0Iuz2v///yH5BAEAAAMALAAAAAAMAAsAAAIhnB+nGrks3Gg0iOvs3TtpzjUgB0zAiV7lMwDCyp7sARsFADs="
     border="0">
</a>
&streamDelim newline;

<a id="hideUI" href="JavaScript:toggleUI();"
   title="Hide Selections"
   style="text-decoration:none; display:block;">
&streamDelim newline;

<img src="data:image/png;base64,R0lGODlhDAALAJEAALHB0CpVgYuz2v///yH5BAEAAAMALAAAAAAMAAsAAAIgnA2nB7ks3AOitpto3TtozgVDAIYGKQTqKp7po6hw/BQAOw=="
     border="0">
</a>


We next begin the div tag for the form/UI (note the id value is referenced above in the JavaScript that toggles the display on/off).

And we use the %include statement which causes PROC STREAM to do a server-side include of the form tag. By making the form a parameter to this template, we can use it to produce any number of reports. The included form generates the output seen in region 3 of figure 1.

<div id="UI" style="float:left;">
<form url="&_url" id="myForm">
&streamDelim;%include srvrpgs(&formUI);


Next is the JavaScript that leverages the JQuery AJAX framework to serialize and submit the form so the output can be displayed in the same page without having to refresh the entire page.

This only uses a few of the options available to the ajax function:
  • url: the url to display
  • success: the code to run if the URL is successfully run
  • note that there is an error/failure option as well. But being an optimist, and since this is a demo, I decided to not worry about that :-).
Note also that:
  • a please wait message is generated along with an image. I decided to not base 64 encode this as the encoded version is pretty long.
  • upon updating the output, the toggleUI JavaScript function is called to hide the form.
For the truly geeky and curious, there are lots of resources that you can find via a simple search that will how/why this works. For the rest of you, all I can say is trust me, it will work for you.

<script type="text/javascript">
    var frm = $('#myForm');
    frm.submit(function () {
    $("#region1").html('<div style="margin-left:50px">'

                     + '<h1>Processing . . . Please Wait . . . </h1>'
                     + '<img src="images/progress.gif""></div>');
    var theURL = "&_url?"+frm.serialize()+'&nocache='+Math.random();
        $.ajax({
            url: theURL,
            success: function (data) {
               $("#region1").html(data);
               toggleUI();
            }
        });
        return false;
    });
</script>
</form>
</div> 


Finally we define the region to contain the output. Note the id of region1 which is used in the AJAX code above. Note also that upon load the initial contents will be the text resulting from resolving the messageText macro variable (see 4 in figure 1). This variable is set in the code that is included when the formUI macro variable is resolved. As mentioned above, this allows for custom text for any given form.

<div id="region1" style="float:left; margin-left:10px;">
  &messageText
</div>

And last, a %include is used to include the footer text (see 5 in figure 1), followed by the /body and /html tags.
&streamDelim;%include srvrpgs(&footer);
</body>
</html>


I hope this all makes sense to you. If not, feel free to post questions about it.

In my next post I will discuss the two included files: shoesUI.HTML and hcsFooter.html.

Monday, January 28, 2013

PROC SUMMARY - not just a summary tool

Yea, I know this sounds like an oxymoron. Why would you want to use PROC SUMMARY for anything other than summarizing data?

I would like to describe two examples where you can use PROC SUMMARY to create
  1. A tree view menu - much like Windows Explorer does with folders and files.
  2. Cascading select tags where the choices are dependent on previous choices.

A Tree View

In chapter 8 of my (upcoming) ebook (SAS® Server Pages: Generating Dynamic Content), there are examples of SAS Server Pages to create a tree view. Each of the examples uses a slightly different technique to create the needed input data set. Consider the data seen in Figure 1  (using the SASHELP.CLASS data set to make it easier for the reader to try out the code below). The data are arranged so the branches and leaves are nested under their respective parents.

For example:
Figure 1. Tree View Data Set

  1. The top level nodes are observations 1(Female) and 16 (Male). This is reflected in the variable nodeText.
  2. Observation 2 is the first Age value (eleven) for girls. Again reflected in the variable nodeText.
  3. Next we see observation 3 for Joyce - an eleven year old girl.
  4. And so on for the rest of the girls.
  5. Next we can see that observation 17 is the first Age value for boys and Thomas at observaion 18 is the only eleven year old boy.
  6. And so on.
This data set was created by a very simple SAS program:

proc summary data = sashelp.class;
 /* create the needed combinations */
 class sex age name;
 types sex
       sex*age
       sex*age*name;
 output out = treeview(drop=_type_ _freq_);
run;
proc sort data = treeview out = treeview;
 /* reorder the data so the branches and
    leaves are below the parent node */
 by sex age name;
run;
data treeview;
 /* create the menu node text */
 set treeview;
 format age words.;
 nodeText =
    coalescec(vvalue(name),vvalue(age),vvalue(sex));
run;

Figure 2. Tree View
The treeNodes SAS Server Page macro, when referenced in a SAS Server Page, will create the expanding/collapsing menu seen (and partially expanded) in Figure 2.

And two other points about the above code:
  1. Notice the use of the coalescec function to get the value of the most detailed branch/leaf.
  2. The vvalue function is used to return the formatted value. The use of this function, even if the variables don't have an assigned format, makes sure that all the arguments to the coalesec function are character (thus avoiding those pesky numeric to character conversion messages).

Cascading Select Tags

Conceptually a cascading select tag is simple. Each choice subsets the items in the next (or dependent) list to only include the dependent values for the current selection.

Creating such a data set is even easier that what is shown above. You just have to run the PROC SUMMARY step:

proc summary data = sashelp.class;
 /* create the needed combinations */
 class sex age name;
 types sex
       sex*age
       sex*age*name;
 output out = dependentSelect(drop=_type_ _freq_);
run;

Figure 3. Cascading Select Tag Data
Upon looking at the output data set (Figure 3), it is easy to see that the the various select tags can be constructed as follows:
  1. Observations 1 and 2 are the values for the Sex select tag.
  2. Observations 3 thru 7 are the values for the Age select tag when the selected value for Sex is F (note that there is no row for Age=16).
  3. Observations 8 thru 13 are the values for the Age select tag when the selected value for Sex is M (note that there is a row for Age=16)
  4. Observation 14 is the only value for the Name select tag for eleven year old girls.
    . . . .
  5. Observations 24 thru 26 are the values for the Name select tag for twelve year old boys.
  6. and so on . . . .
And, it should go without saying that the above code can be parameterized as a utility macro. But that is a topic for a future blog posting. As is a utility macro to generate the dependent select tags.

Sunday, January 6, 2013

A sample Dual Listbox Selector SAS Server Page

In my Section 5.3.4 of my ebook (SAS® Server Pages: Generating Dynamic Content) which describes the generateOptionTag utility macro, I reference this blog entry as an example of using  a dual listbox selector to allow for multiple selections.  See the example screen shot (at right) that uses the sashelp.class data set.

This sample SAS Server Page makes use of a number of features of PROC STREAM, some JavaScript code, and two utility macros. Before I describe the details of this sample, please feel free to give it a try on my demo server using the Stored Process Server (the example also works for the SAS/InterNet Application Dispatcher):

http://demos.hcsbi.com:8080/SASStoredProcess/guest?_program=/sspebook/sasServerPage&page=dualListBox

To move items you can either:
  • double click them
  • single click and then use the arrows to move the selected items
  • move them all use the double arrows
  • you can also move a selected up or down in the list
Then click the Review Name/Value Pairs button to see a list of the items in each box.

Now lets take a quick look at this sample SAS Server Page. Note that this is just a sample. It might make sense to create a template (or a macro) that can have parameters passed to it. For now, I wanted to keep it simple, thus this sample.

The readfile option of the &streamDelim facility of PROC STREAM is used to define the JavaScript routines that are used to move the items. We use readfile here so the text is included in the page rather than assuming it is available on the web server.


Next we set up the form. Note the following:
  • Two macro variables are defined since we will need to refer to the names of the left (i.e., Available in this case) and right (i.e., Selected in this case) select tags numerous times.
  • The onSubmit JavaScript hander is used to make sure all the items in both select tags are selected.
  • The _debug value of 1 generates the display of the name value pairs passed to the stored process.


Use an HTML table to control the layout of the two select tags and the icons/images that are used to move items.


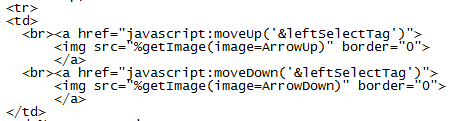
Use the getImage utility macro (discussed in a previous blog, The getImage macro: embedded images using text strings) to generate the images for the up and down arrows in the first table column.


The generateOptionTag macro is used to create the left hand select tag in the second table column. It is populated from the students in the SASHELP.CLASS data set who are 13 years old or younger. Note that the otherOptions parameter of the macro is used to pass in extra paramaters to be included on the select tag:
  • The size option to specify that the select tag should be 20 rows long
  • The mulitple option to specify that multiple selections are allowed (part of the point of a dual list list box selector)
  • A style attribute to define the width
  • the onDblClick JavaScript handler so that when a user double clicks on an item it is moved from the left select tag to the righ select tag.


The getImage macro is used to generate the images/icons (in the third table column) used to move items:
  • Move all the items from the left to the right select tag
  • Move only the selected items from the left to the right select tag
  • Move only the selected items from the right to the left select tag
  • Move all the items from the right to the left select tag


Just as for the left select tag, the generateOptionTag macro is used to create the right hand select tag in the second table column. It is populated from the students in the SASHELP.CLASS data set who are older tha 13.


The last column is similar to the first one - except the the Move Up and Move Down images are for the right hand select tag


The final bit of HTML closes the table, generates the submit button, closes the form and the HMTL page.


I plan to write a future blog posting to generalize/parameterize this functionality and will include a link to a zip file of the components. In the meantime, please feel free to comment and ask questions about this example.

Tuesday, January 1, 2013

The getImage macro: embedded images using text strings

A little known HTML trick is that you can embed images in an HTML file using a Base 64 representation of an image. For example, this folder open image:

is generated using the following text in an HTML page:

<img src="data:image/png;base64,R0lGODlhEAAQAKL/AP//////
AMDAwMDAwICAgICA\AAAAAAAAACH5BAEAAAIALAAAAAAQAB
AAAANFKEpMpjAKAkYYTkJqu2sbII6kSCzApXbqM1VrPLiUWpYGFwB
F7/+51ID3KwaHReNrlwS+iM0CTRTtTavSjWHL7W41YE0CADs=">

There are a number of reasons why you, as a developer, might want to use base 64 encoding of images in your web pages, for example:
  • you don't have control over the images directory of your web server and you can't add images.
  • you don't want to have to deal with the actual url path to the image when creating an html file (either static or dynamic).
    • this is a bigger issue for html files not served via a web server (e.g., they are access via the file system and thus easily moved around)
  • minimizing round trips to the server when the page is accessed
There are a number of web sites that you can use to convert an image to its it base 64 encoded value. A simple search will find any number of tools you can use to do this. For example:

https://www.google.com/search?q=base64+encoded+image

As a best practice you should limit the use of base 64 encoded images to small images where the base 64 text is not too long. Note that lines feeds are allowed in the HTML text).

The getImage macro is a utility macro designed to be used to generate such images in SAS Server Pages. See my SAS Press e-book, SAS® Server Pages: Generating Dynamic Content, for more information about SAS Server Pages. Just use the macro in a SAS Server Page as follows to insert an image:
  • <img src="%getImage(image=OpenFolder)">
You can download a zip file containing the macro, along with:
  • SAS transport file of a data set containing a number of sample images
  • a sample program illustrating the use of the macro
My next blog entry will use this macro in a sample dual listbox SAS Server Page.

Friday, April 20, 2012

A SAS Server Page UI for the Pie Chart

In my last post, A JavaScript Based Pie Chart, I showed a JavaScript based SAS Server Page that produced a pie chart using SAS data. That post illustrated how different pie charts could be produced by including parameters (also known as name/value pairs) in the URL. Clearly manually editing URLs to change the data or characteristics of the output from a web report is not desirable. Web pages should be created to provide options to the user that they can select.

This post describes using a SAS Server Page to present the user with the available choices. Try out this sample SAS Server Page based UI by clicking on either of the following links:
And here is the source for the SAS Server Page, interspersed with comments.

Assign a default for the data set to use. The data set could be selected in a prior page. To keep this example simple, a different data set can be specified by adding data to the URL as a name/value pair. The %sysfunc macro function uses the COALESCEC function to assign a default value. The macro variables lib and mem are used later in the page.

%global data;
%let data = %sysfunc(coalescec(&data,sashelp.shoes));
%let lib = %upcase(%scan(&data,1));
%let mem = %upcase(%scan(&data,2));


The initial HTML tags.

<html>
<head>
<title>UI for PieChart SSP Example</title>
</head>

When the page is initially loaded, submit the form with the default values.

<body onLoad="document.forms[0].submit();">

The FORM tag specifies that the output is displayed in another part of the page. It also uses the macro variable, _URL. This macro variable is created by the server and using this parameter is a sugggested Best Practice. Using _URL also allows for the same SAS Server Page to be processed by the both the Stored Process Server as well as the SAS/IntrNet Application Dispatcher.

<form action="&_url" target="results">

A standard header is defined by using %INCLUDE to dynamically include another input SAS Server Page. Using %INCLUDE ensures consistency and allows for easy updates/maintenance.

&streamDelim;%include srvrpgs(standardHeader.html);

Use an HTML table to arrange the select tags along the top of the page.

<table border="0">

Use the server created macro variable _program - both this UI and the PieChart SAS Server Page use the sasServerPage program. Using &_program is another Best Practice.

<input type="hidden" name="_program" value="&_program">
<input type="hidden" name="page" value="PieChart">
<input type="hidden" name="data" value="&data">

Use the generateOptionTag macro (a topic for a future posting), to create a select tag from data in a SAS Data Set. In this case, the data set is one that was created by a program that queried the provided SAS Styles to extract the color schemes.

<tr>
<td>ODS Color Pattern:
<td>%generateOptionTag
        (data=parms.colorList
        ,var=colorlist
        ,name=colors
        ,label=Style
        )

Use the generateOptionTag macro using the DATA step views of the dictionary tables. In this case the slice variables are limited to character variables (not a good approach in general - but done here for the sake of simplicity).

<td>Slice Variable:
<td>%generateOptionTag
        (data=sashelp.vcolumn
        ,var=name
        ,name=class
        ,selected=Product
        ,where=libname="&lib"
               and memname="&mem"
               and type="char"
        )

Use the generateOptionTag macro again, this time including numeric variables.

lt;td>Analysis Variable:
<td>%generateOptionTag
        (data=sashelp.vcolumn
        ,var=name
        ,name=var
        ,selected=Sales
        ,where=libname="&lib"
               and memname="&mem"
               and type="num"
        )

A hard-coded select tag for the statistic to use.

<td>Statistic:
<td>@select name="statistic">
    @option>Sum
    @option>Mean
    @option>Min
    @option>Max
</select>

The submit button and close the form.

<td>@input type="submit" value="Run">
<form>
</tr>
</table>

An iframe tag is used the embed the output into the same page as the UI. Note that the value of the name parameter matches the target value from the form tag.

<iframe name="results"
        width="100%"
        height="100%"
        frameborder="0">
</iframe>

Close the HTML page.

</body>
</html>

Friday, April 13, 2012

Creating a simple UI

The point of this post is to illustrate how PROC STREAM and SAS Server Pages can be used to not only create the desired content, but also to create a user interface for a stored process (or SAS/IntrNet Application Dispatcher program). Following up on my previous posts, we need to allow the user to select which student letter is to be generated. Before describing how to do that, lets look at the results first:
We invoke the sasServerPage stored process (or SAS/IntrNet Application Dispatcher program) and just need to define the name of our input SAS Server Page which allows us to select the student for whom we'd like to generate the letter.

Here is the source for our input SAS Server Page, followed by a few notes and key points about it.

%let rc = %sysfunc(dosubl('%selectTag'));
<html>
<head>
<title>Select Letter to Generate
</head>
&streamDelim;%include srvrpgs(standardHeader.html);
<table style="width:100%; height:100%;">
<tr>
<td align="left" valign="top">
<form action="&_url" target="letter">
<input type="hidden" name="_program" value="&_program">
<input type="hidden" name="page" value="class_w_DoSub">
&selectTag
<p><input type="submit" value="Display Letter">
</form>
</td>
<td>
<iframe name="letter"
        style="width:100%; height:100%;"
        frameborder="0">
</iframe>
</td>
</tr>
</table>
</body>
</html>

Now a few notes about what is going on in the above SAS Server Page:
  • We are using DOSUBL to run some SAS code. In this case a macro (included below) that reads the SASHELP.CLASS data set and creates a macro variable that contains the text for the select tag of students that you see when you click on either of the links above to see the results.
    • The technique used here does require the M2 release of PROC STREAM/DOSUBL.
    • Note that the macro call is quoted with single quotes. Typically when functions are invoked with the %SYSFUNC macro, text is not quoted. However (again for the M2 release), for the DOSUBL function the decision was made to allow for the argument to be quoted - the rationale being that it might be desirable to allow for a single quoted string to provide a method to prevent macros froms being resolved in-line. Thus, starting with the M2 release, DOSUBL will recognize that there are leading/trailing quotes and will ignore them, thereby allowing a macro specification to be given and not expanded by %SYSFUNC.
    • Note however that the argument to DOSUBL does not need to be quoted.
    • Also note that there was no need to use a macro here. As seen in previous posts, the argument to DOSUBL could be the DATA Step code that the macro generates. I chose to use a macro here to highlight the fact that the argument to DOSUB could be a macro and also to highlight the quoting issue mentioned above.
  • The select tag is included in the output simply by using the macro variable reference &selectTag.
  • A %INCLUDE is used in the SAS Server Page to define a standard set of header text. In this example, is the the text on the grey backgound with the links to my book page on sasCommunity.org and to my web-site. I could have just as easily included trailer text, or both header and trailer text - simply by including the approapriate file.
  • Since both this user interface SAS Server Page and the SAS Server Page for the letter are self-contained (i.e., any needed SAS code is included instead of in separate programs to be run), we can simply chain these together using the same stored process, sasServerPage (which we can reference using the server created macro variable _program), and just specify the name of the input SAS Server Page using the page parameter.
  • We have complete control over how and where the output is displayed since we have complete control over what the SAS Server Pages do. In this case, we use the <iframe> tag so the user interface and the output appear in the same browser window. 
Here is the macro that we are invoking in the DOSUBL call. But before showing the code, a few disclaimers about it:
Here is the code with no explanation since it should be easy to undertand by most SAS programmers. And furthermore, it is not an approach I would want readers to think is a good idea. :-).

%macro selectTag;
 data _null_;
  length selectTag $32767;
  retain selectTag '<select name="letterObs">';
  set sashelp.class(keep=name) end=lr;
  selectTag = cats(selectTag
                  ,'<option value="'
                  ,_n_
                  ,'">'
                  ,name
                  ,'</option>'
                  );
  if lr;
  selectTag = cats(selectTag,'</select>');
  call symputx('selectTag',selectTag,'G');
 run;
%mend selectTag;